There are multiple ways to record a hike with the HiiKER app.
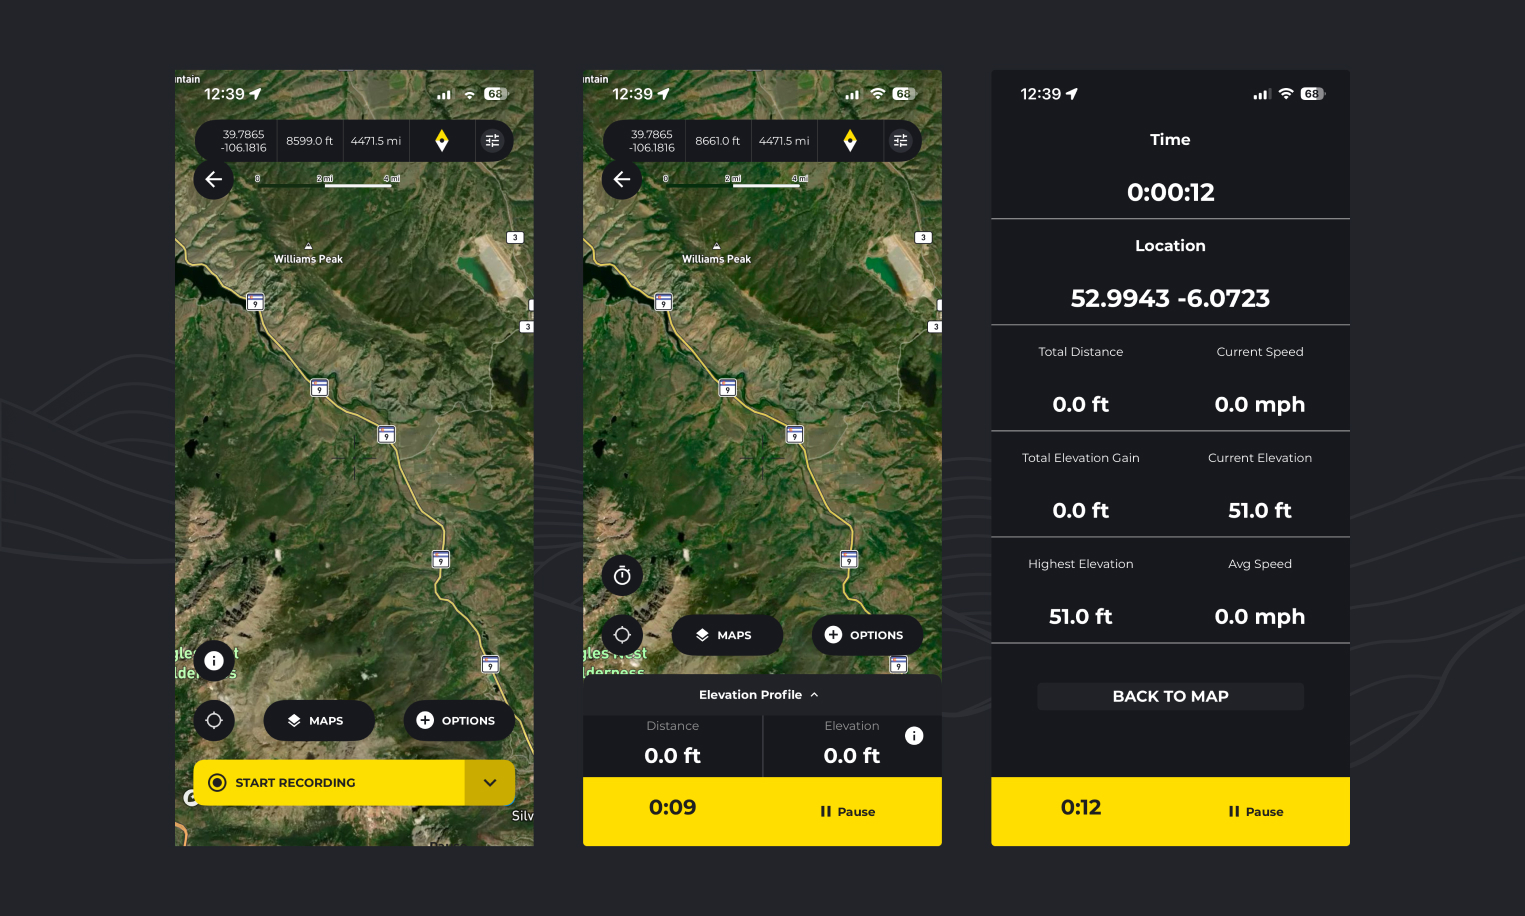
Start recording
Go to the Record tab in the navigation
Tap “Start Recording” to begin immediately
Or to choose a guide:
Tap the arrow beside the “Start Recording” button
Select one of the following options:
Start without a guide – Record your hike without a predefined route
Choose a Hiiker hike – Follow an existing HiiKER hike
Choose from my hikes – Use one of your saved hikes as a guide
Track a recorded route – Follow one of your previous recordings

View stats
Tap the stopwatch button to view your progress, including time, distance, speed, and elevation
Tap the map icon to return to the map view
Pause and finish
Hold the pause button for 3 seconds to pause your recording
While paused, you can:
Tap “Resume” to continue
Tap “Finish” to end your hike
Save your recording
After finishing, enter details and tap “Save” Your hike will appear in your recorded hikes list
How do I import recordings to HiiKER?
On the HiiKER website, you can import recordings (in bulk if you wish!)
- Go to your recordings list
- Click the import button
- Select a recording file (Or many recording files) that you have output from another platform to upload
How do I move my recordings from AllTrails to HiiKER?
- Log into AllTrails.com
- Click your profile icon (top right) → “Show profile”
- Go to the “Activities” tab
- Click on the activity you want to export
- Click the overflow menu (3 dots) above the activity title
- Select “Download route”
- Choose your file format (GPX Track is most common) and click “OK”
- Once you have the files, follow the “How do I import recordings to HiiKER?” steps above.
Note: If you have a LOT of recording on AllTrails and downloading each individual file is not possible, you can request a complete copy of all your account data through AllTrails’ Privacy Center at https://privacy.alltrails.com/policies/en-US AllTrails. This process can take up to 30 days and will include all your activities in one package.
How do I move my recordings from OS Maps to HiiKER?
To export a single activity/recording:
The documentation mentions you can export routes as GPX files, but there’s a workaround needed for recorded activities. Users report you need to turn your recorded activity into a new route first, then you can export that route.
On Mobile App (Premium subscription required):
- Go to ‘Saved’ tab → ‘My Routes’
- Select the route you want to export
- Tap the overflow menu (3 dots)
- Select ‘Export GPX’
- Choose where to save it.
- Once you have the files, follow the “How do I import recordings to HiiKER?” steps above.
Note: On Android, the OS Maps app sometimes doesn’t add the .gpx file extension properly, so you may need to manually rename the file and add .gpx to the filename
A bulk export doesn’t seem to be available on OS Maps at the moment
How do I move my recordings from OutdoorActive to HiiKER?
On Website:
- Log into your OutdoorActive account
- Go to Menu → My Page → Tracks (or visit outdooractive.com/en/mypage/tracks.html)
- Select the track you want to export
- Hover over the 3 dots menu
- Click on “GPX” (or choose FIT format)
- Download the file to your computer
On Mobile App:
- Open the track you want to export
- Tap the 3 dots at the top right
- Select “Export GPX”
- Save the file
Once you have the files, follow the “How do I import recordings to HiiKER?” steps above.
How do I move my recordings from Komoot to HiiKER?
On Website:
- Log into Komoot
- Click on your username
- Select “Planned” or “Completed” (depending on the tour type)
- Select the tour you want to export
- Click “Download GPS file” or “Export to GPS Device”
- The GPX file downloads to your computer
On Mobile App:
- Tap Profile
- Choose “Planned” or “Completed”
- Select the tour you want to export
- Tap “More” (3 dots)
- Select “Download GPS file”
Note: To export a GPX file, the region in which the tour starts must be unlocked
Once you have the files, follow the “How do I import recordings to HiiKER?” steps above.